This post may contain affiliate links, which means I may receive commission from purchases made through links.
If you’ve been wanting to upgrade your living room without spending thousands, this DIY accent wall is the perfect project. We completely transformed our space with a high-end look using simple materials, a little creativity, and a bold design choice, black paint on the sides for contrast.
Why We Chose an Accent Wall
Our living room felt plain and lacked a focal point. Instead of buying expensive furniture or décor, we decided to create a statement wall that would instantly elevate the entire space.
Accent walls are one of the most affordable ways to:
- Add dimension and texture
- Create a designer look
- Make your space feel custom
Materials We Used
Here’s everything we used to bring this wall to life:
- Wood Slat Acoustic Panels
- Screws (included with slats, shelves, and entertainment center)
- Laser Level with Tripod
- Measuring tape
- Painter’s tape
- Black paint (for the side sections)
- Nail gun (for baseboards)
- Caulk & Sandpaper (baseboards)
- Paint rollers & brushes
- Drill (Screwdriving tasks)
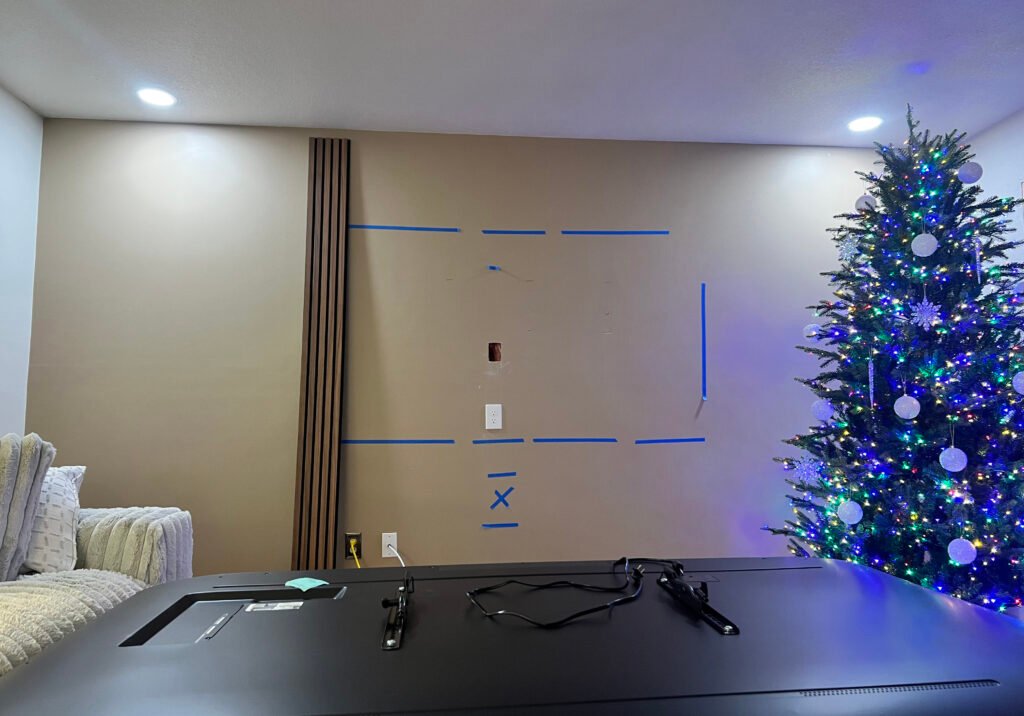
Plan Your Layout, TV First
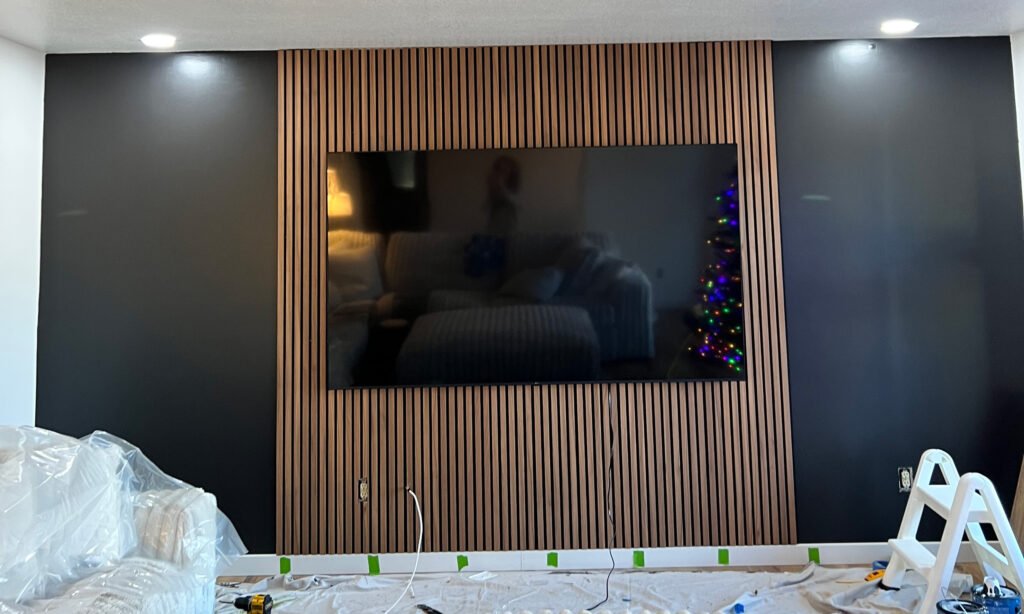
We measured and mapped out exactly where the TV would go using painter’s tape, marking the center and dimensions. Then we had an electrician install a plug behind the TV for a clean, cordless look. While he was here, we also added two recessed ceiling lights, one on each side. They’re color-changing, so we can easily switch the mood or update the look for holidays. Planning this first makes the entire wall feel intentional and high-end.
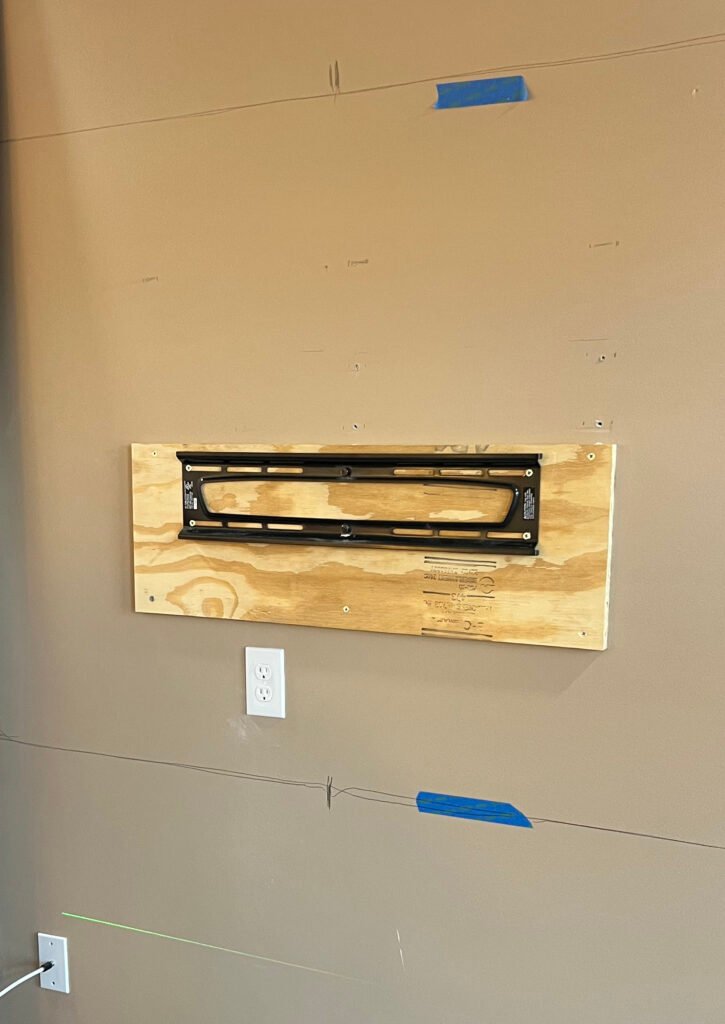
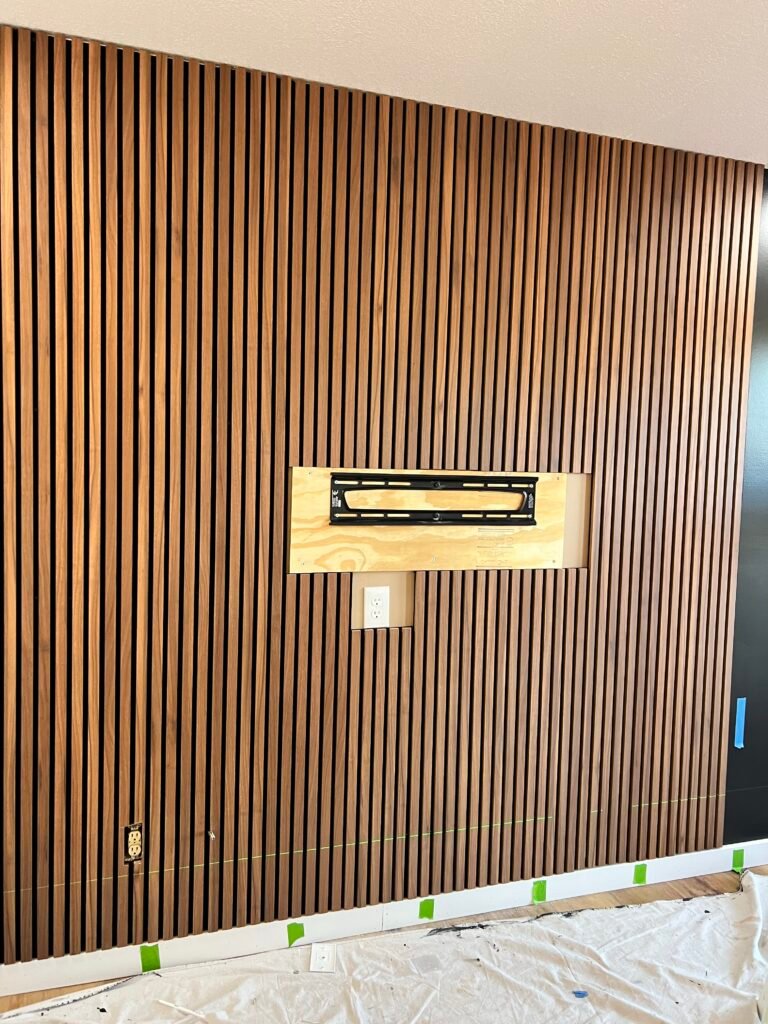
Mount the TV Bracket
Once the layout was finalized, we installed the TV mount, adding a larger board underneath to ensure it was securely anchored into the studs. We used a laser level to keep everything straight and double-checked the alignment with our layout to make sure the TV would be perfectly centered.
Paint the Sides Black then Add Trim
Before installing the wood slats, we painted both side sections of the wall black, carefully taping off clean lines and applying multiple coats for full, even coverage. The black adds depth and contrast, making the wood slats stand out. To finish the look, we installed white baseboards along the bottom using a nail gun and painted them for a clean, polished finish.
Tip: Mark the studs with painters tape 😉
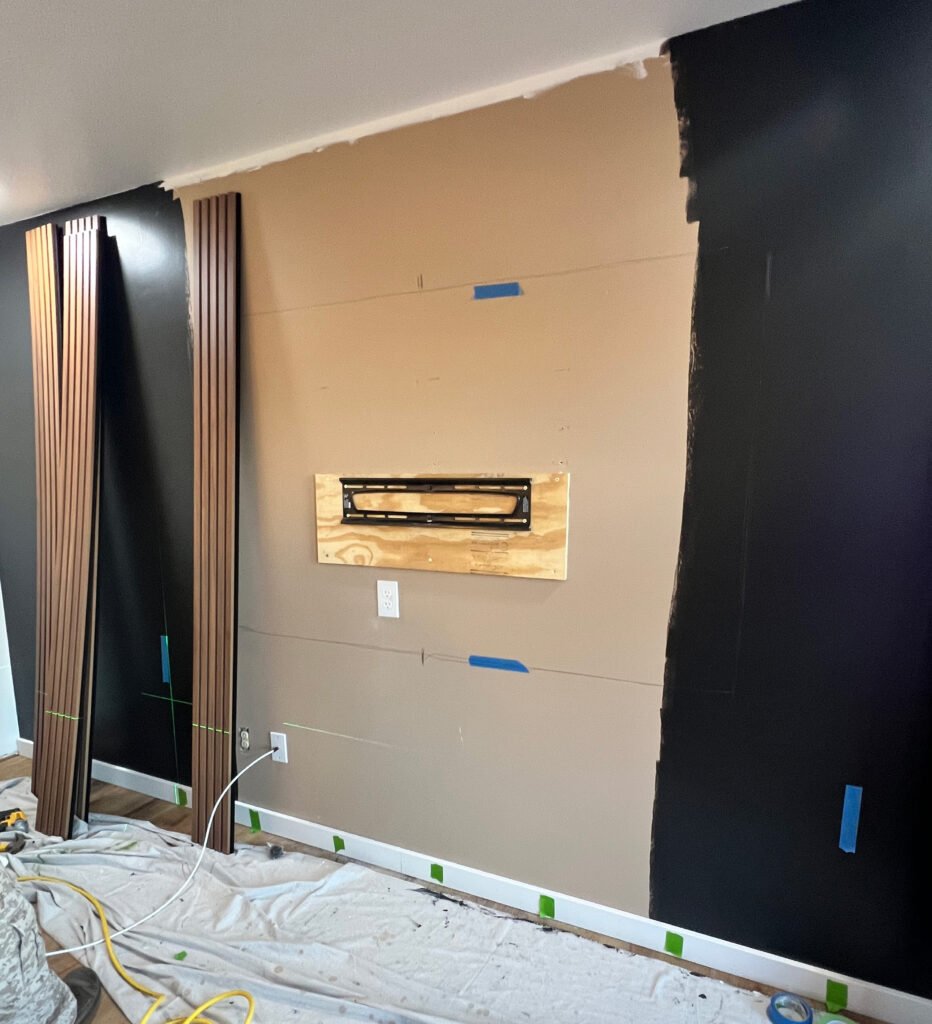
Install the Wood Slats
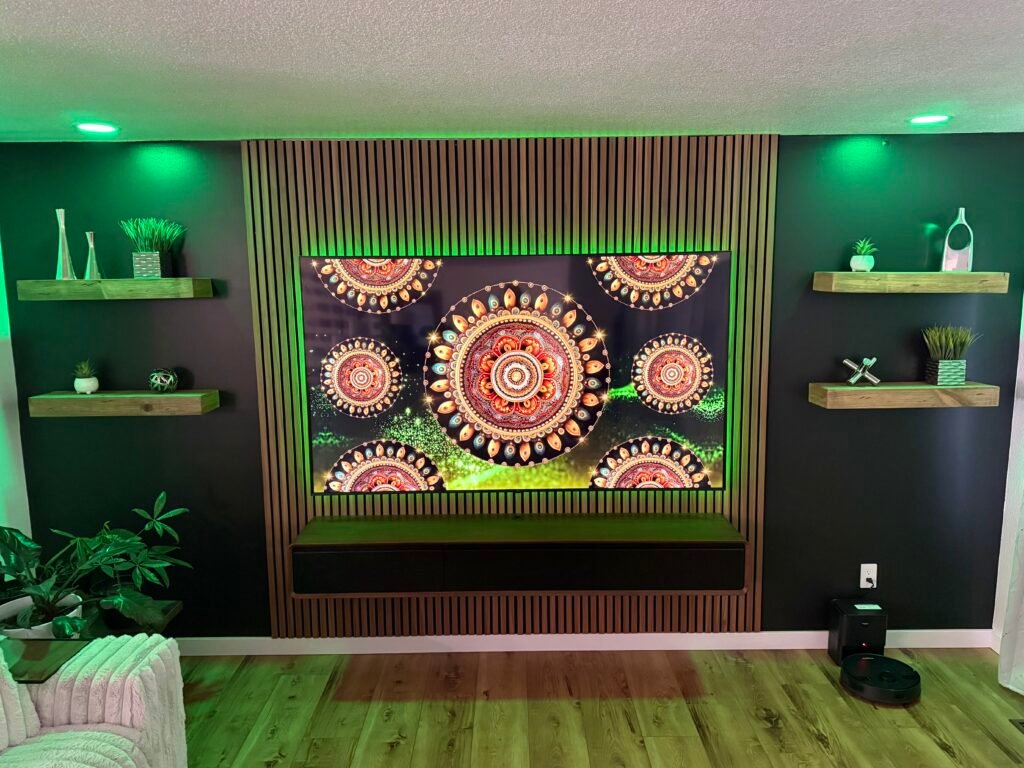
Next, we installed the wood slats using the screws that came with them, making sure each piece was secure. We carefully positioned the slats so they sat directly behind the TV and extended them slightly beyond each side to create a balanced, built-in look. This step is what really brings the whole design together and creates that modern, high-end statement wall look.

- Superior Acoustic Performance: It is designed to provide excellent noise-cancellation capabilities, making it ideal for …
- Aesthetically Pleasing: It is not only functional but also visually appealing. The wooden slats create a natural and war…
- Easy to Install: Installing is quick and easy. The panel can be mounted on walls and ceilings with basic tools in short …
Hang the TV
After the slats were installed, we mounted the TV.
Seeing it come together at this stage really brings the whole vision to life.
Install Shelves & Floating Console
Finally, we completed the wall:
- Hung floating shelves
- Installed a floating entertainment center under the TV
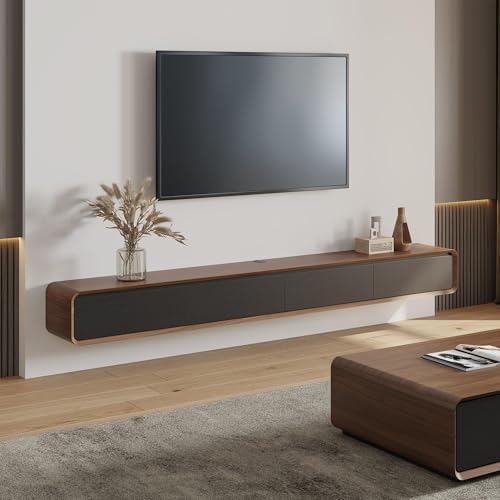
- Fully Assembled TV Console: The floating tv stand is pre assembled before delivery, you only need to install it on the w…
- Hidden Large Storage Space: 4 flip-down doors unveil ample storage space to keep all the media accessories in check. Clo…
- Sturdy Material: Crafted from E0-Grade high-strength MDF and finished by natural oak veneer offers a long-term use. The …

Style the Space (Final Touches)
This is where everything really came together.
- Styled the shelves with silver décor for a pop against the black walls
- Added faux plants for warmth and texture
- Kept décor minimal for a clean, modern look


We added a robot vacuum to help keep the space looking clean, it even mops. 🙌 We also use screensavers from YouTube or Amazon Prime to elevate the space and make the room feel more warm and inviting.
The Results
Take your time. Precision makes all the difference.

Final Thoughts
This DIY accent wall completely changed the look and feel of our living room. It’s one of those projects that looks expensive but is actually very budget-friendly.
If you’ve been on the fence about trying it, this is your sign. You don’t need to be a professional to create something beautiful just a plan and a little patience.